

Finally, summer in New York is about to be in full swing! Get your Sunglasses & Cool drinks ready !
Well, in my opinion, Like Pastels are for spring, Neons are for summer ! Therefore, giving my wardrobe a neon twist with this easy DIY Dress :)


Things you need: Fashion Fabric 2 yards (1.5 yards for skirt & 0.5 yard for top),
Fabric for lining(optional)
Pattern paper or Newspaper,
Measuring tape, Ruler,
Matching Threads & Zipper, Sewing Machine,
And a rough sketch of how you want the dress to turn out (optional).

Length vise measurements: Neckline to Chest,
Neckline to Waist,
Waist to Armhole,
Desired Skirt length(waist to hem)
Width vise measurements: Neckline [ I kept mine 4 inches wide ]
Chest & Waist Measurement.
Part 1: Making a Box Pleated Skirt:
We need two Measurements Length & Width. Take your waist measurement and multiple with 3, this will be width of the fabric you will need.
Now cut the fabric with Length = Desired Skirt length & Width = Waist x 3.
Leave one inch seam allowance at the sides, and start pleating. There are different ways/techniques to pleat, you can check out this video for more options. I took 1 inch of fabric & folded it to left first, gave 1 inch gap and folded 1 inch of fabric to right there by creating a box pleats of 3 inches approx.

Continue pleating till u reached the end of fabric. Try the skirt around your waist, mine was little tight so removed a pleat from both ends and it fits perfectly. Once happy with this, take it to you're sewing machine and stitch across to hold the pleats in place.

Hem the bottom of the skirt, as it is much simpler to do so now then at end.

Make a waist band with width=waist measurement & length=2 Inches.

If your fabric is thick enough you can skip this step. My fabric needed lining, so I cut equal part of fabric for skirt & waist band and stitched them to respective fashion fabrics.

Now place lined skirt & lined waist band facing right sides together and stitch across.

Part 2: Making Halter Top:
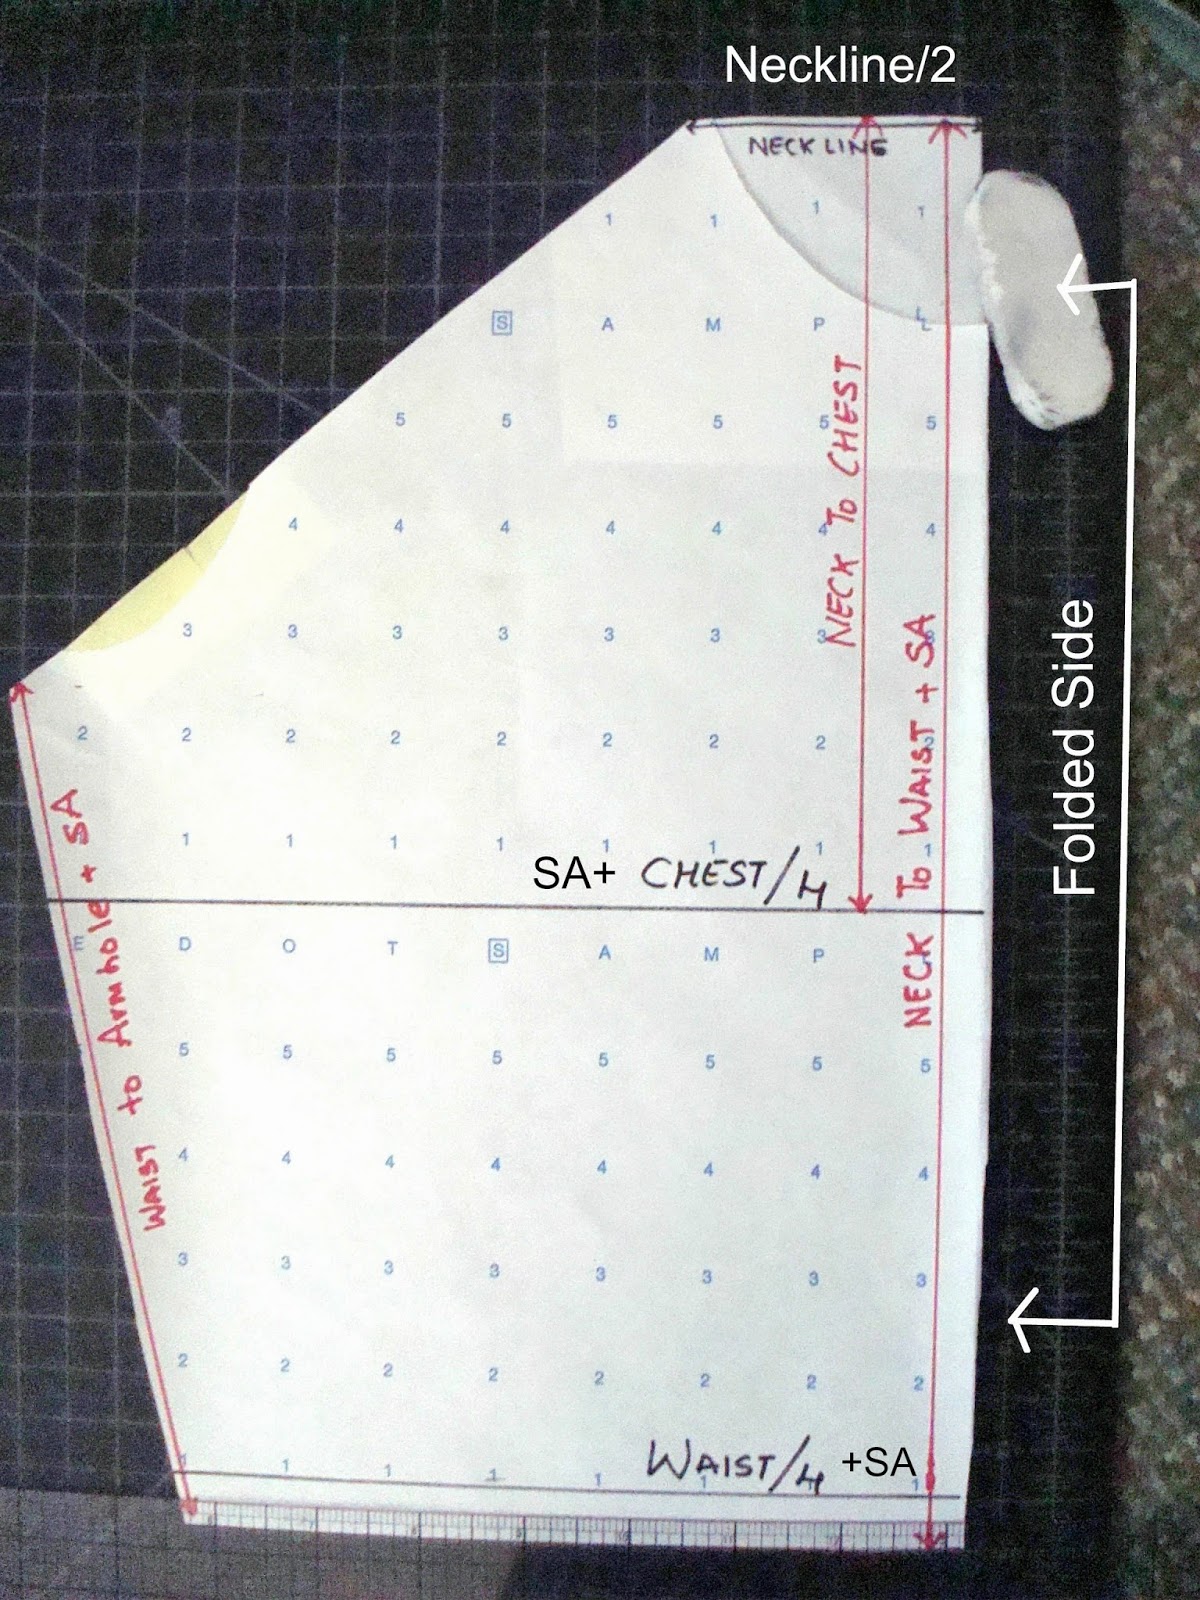
Fold pattern paper or newspaper in half and mark all the points as below & cut. I marked my neckline 4 inches below the shoulder point. (SA-Seam Allowance = 1/2 inch) Since this is a halter, draw a line from armhole point to neckline & cut.

Now place the above two patterns on a folded fabric as seen below & cut.

You will have three pieces like this

Pleat the front of the top as seen below and stitch across to hold them in place.

Now place the front & back pieces with right sides facing together and stitch the side seams.

Place the top & skirt's waist band facing right sides and stitch across.

It should look like the image below when you are done. Now measure along the white line to determine the length of shoulder straps. and add 4+4= 8 inches to that length.

I made Bias tape straps from left over fabric. And attached them to top.

Last step is to put in a zipper. And iron/press your dress with hot iron to finish.

Thank you for stopping by :)
No comments:
Post a Comment